Maximizing the Potential of Your 10 12 Channel Digital Mixer
In the world of modern audio production, a 10 12 channel digital mixer provides a versatile and efficient solution for both small and medium-sized setups. Whether you’re working in a studio, performing live, or mixing for broadcasts, understanding how to fully maximize the potential of your digital mixer can elevate your sound quality and overall experience. This article will guide you through the best practices, tips, and techniques for getting the most out of your 10 12 channel digital mixer, helping you achieve professional-grade results in any environment.
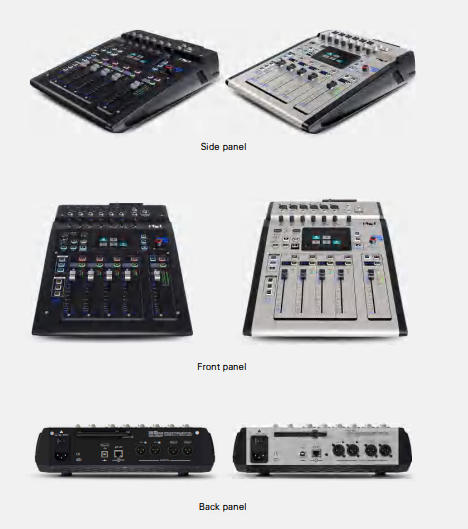
Understanding Your 10 12 Channel Digital Mixer
What Is a 10 12 Channel Digital Mixer?
A 10 12 channel digital mixer is a compact audio mixing console designed to handle up to 12 input channels. These mixers digitize the audio signals and offer more advanced features than traditional analog mixers. They are ideal for situations where multiple inputs need to be managed simultaneously, such as live sound events, recording sessions, or broadcasting. With the addition of effects processing, built-in EQ, and routing options, digital mixers offer greater flexibility and precision.
Key Features of 10 12 Channel Digital Mixers
Digital mixers come with a variety of built-in features that can greatly improve your workflow. These may include:
- Built-in effects: Reverb, delay, EQ, and other effects can be applied to individual channels.
- Channel strips: Each input channel has its own dedicated controls for adjusting volume, pan, EQ, and other settings.
- Remote control: Many 10 12 channel digital mixers can be controlled via tablet, smartphone, or computer for added convenience during performances or studio sessions.
- Flexible routing: You can route audio signals to different outputs with ease, making it suitable for complex setups.
Getting the Most Out of Your 10 12 Channel Digital Mixer
Optimize Your Channel Settings
One of the key benefits of a 10 12 channel digital mixer is the ability to fine-tune each individual channel. Here are some tips to help you get the most out of your channels:
- Set proper gain levels: Begin by adjusting the input gain to ensure the audio signals are clean and free of distortion. Aim for a healthy signal level without clipping, typically around 0 dB to +3 dB.
- Use EQ effectively: Digital mixers often come with multi-band equalizers, allowing you to adjust the frequency response of each channel. Use EQ to cut unwanted frequencies and enhance the desired ones, ensuring that each instrument or vocal sits well in the mix.
- Pan channels for clarity: Panning can help separate instruments in the stereo field. For example, position guitars slightly left and right, while keeping vocals and kick drums centered. This creates a cleaner and more balanced mix.
- Monitor levels and make adjustments: Regularly monitor the levels of each channel to ensure they’re balanced and within optimal ranges. Adjust accordingly to avoid distortion or a muddy mix.
Utilize Built-In Effects and Processing
A 10 12 channel digital mixer often comes with a variety of built-in effects, such as reverb, delay, chorus, and more. These effects can add depth and texture to your mix, making it sound more professional. Here’s how to utilize them effectively:
- Apply reverb and delay for depth: Reverb can create a sense of space in the mix, while delay can add a rhythmic dimension to vocals or instruments. Use these effects sparingly to avoid overwhelming the mix.
- Use compression to control dynamics: Compression helps to control the volume dynamics of a track by reducing the level of loud sounds and boosting softer sounds. This ensures a more consistent and polished mix.
- Experiment with modulation effects: Chorus, flanger, and phaser effects can add interesting movement to your mix, especially on instruments like guitars or synths.
Advanced Techniques for Your 10 12 Channel Digital Mixer
Create Submixes and Groups
One of the most powerful features of a 10 12 channel digital mixer is the ability to create submixes or groups. By grouping related channels together (such as drums, vocals, or backing instruments), you can control their volume and effects more efficiently. This reduces the amount of manual adjustments you need to make and helps create a cohesive mix.
For example, if you have multiple microphones for drums, you can group them into a “drum” submix. From there, you can adjust the overall volume, EQ, and effects for the entire drum kit without touching each individual mic’s settings. This technique is particularly useful in live sound scenarios where quick adjustments are necessary.
Take Advantage of Digital Routing
With digital mixers, you have complete flexibility in routing audio signals to various outputs, which allows for precise control over your mix. For instance, you can send individual channels to different monitors, recorders, or speakers. Additionally, a 10 12 channel digital mixer often provides flexible routing options for mixing in surround sound or multi-zone environments.
Consider the following digital routing techniques:
- Multiple monitor mixes: In live performances, musicians often require their own custom mix in their monitors. Digital mixers make it easy to create unique monitor mixes for each musician on stage.
- Recording separate tracks: If you’re recording, send each input channel to its own track on a DAW or multitrack recorder. This allows you to have greater control during post-production.
- Apply effects per output: For different audio outputs (front-of-house speakers, monitors, or recording), you can apply different effects or EQ settings.
Use Automation for Smooth Transitions
Many 10 12 channel digital mixers offer automation features that can save you time and effort during live performances or recording sessions. Automation allows you to program changes in volume, effects, EQ, and more, creating smooth transitions between different sections of a song or performance.
For instance, you can automate a gradual fade-in for a vocal during an intro or increase the reverb on a guitar solo. This creates a polished, professional sound without requiring manual intervention.
Troubleshooting Common Issues with Your 10 12 Channel Digital Mixer
Addressing Distortion and Clipping
If you notice distortion or clipping in your mix, check the gain structure of each channel. Ensure that the input gain levels are properly set, and avoid pushing them too high. Additionally, check the master output levels to make sure they aren’t peaking.
Low Signal Levels
Low signal levels can result in a weak or thin sound. Make sure the gain is adjusted correctly, and use the EQ to enhance frequencies that may be lacking. Also, check the cables and connections for any issues.
Unwanted Noise or Hum
Ground loops or interference can introduce unwanted noise into your mix. To eliminate hum, make sure all equipment is properly grounded and use balanced cables for connections wherever possible.
Maximizing the potential of your 10 12 channel digital mixer is crucial for achieving professional-quality mixes, whether you’re performing live, recording in the studio, or mixing audio for broadcast. By fine-tuning channel settings, utilizing built-in effects, creating submixes, and employing digital routing techniques, you can ensure that your mix sounds polished and balanced.
Incorporating advanced automation features and troubleshooting common issues further enhances your workflow and ensures that your digital mixer performs at its best. The 10 12 channel digital mixer is a powerful tool, and with the right knowledge and techniques, you can unlock its full potential to deliver exceptional audio experiences.