Guidelines for Using Rackmount Digital Mixers
Rackmount digital mixers have become a staple in professional audio setups due to their compact design and powerful features. Whether you’re running a live sound system, working in a recording studio, or managing audio for a large-scale event, these mixers offer incredible flexibility and control. With advancements in digital technology, rackmount digital mixers provide superior audio processing capabilities, offering built-in effects, multi-track recording, and precise signal routing. In this guide, we will discuss essential tips and best practices for using rackmount digital mixers to maximize their potential and achieve optimal audio performance.
Understanding the Importance of Rackmount Digital Mixers
The Role of Rackmount Digital Mixers in Audio Systems
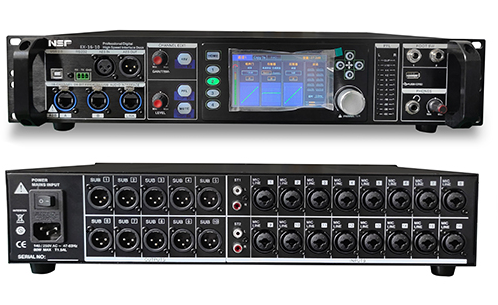
Rackmount digital mixers are designed to offer a centralized hub for audio control in professional setups. Their primary role is to combine multiple audio sources—such as microphones, instruments, and playback devices—into a cohesive output. Unlike analog mixers, rackmount digital mixers process audio signals in the digital domain, enabling advanced features such as built-in digital effects, equalization, and compression.
These mixers are especially useful for sound engineers who need to manage large amounts of audio inputs and outputs while maintaining high sound quality. The rackmount form factor allows them to fit into standard 19-inch racks, saving space and making them ideal for touring sound systems, studios, and permanent installations.
Why Choose Rackmount Digital Mixers?
The main advantage of rackmount digital mixers is their versatility and convenience. Here are some reasons why they are preferred in professional audio environments:
Compact Design:The rackmount form factor saves valuable space, allowing for a more organized and streamlined setup.
Advanced Features:Digital mixers come with advanced features such as onboard processing, preset configurations, multi-track recording, and digital signal routing.
Ease of Use:With intuitive touchscreen interfaces and customizable control layouts, rackmount digital mixers make complex audio setups easier to manage.
High Sound Quality:Digital signal processing (DSP) ensures precise audio adjustments, reducing noise and enhancing overall sound clarity.
Setting Up Your Rackmount Digital Mixer
Preparing Your Space for the Mixer
Before you start installing your rackmount digital mixer, it’s essential to prepare the environment where it will be used. Consider the following steps for optimal setup:
Rack Space:Ensure you have enough rack space to mount your mixer securely. Most rackmount digital mixers are 1U, 2U, or 3U in size, so check the dimensions of the mixer and make sure the rack can accommodate it.
Ventilation:Rackmount digital mixers generate heat during operation, so ensure there’s adequate ventilation in the rack to prevent overheating. Proper airflow helps prolong the life of your equipment.
Cable Management:Plan your cable management carefully to reduce clutter and improve the organization of your setup. Use cable ties, velcro straps, and labeled cables to keep things neat and accessible.
Installing Your Rackmount Digital Mixer
To install the rackmount digital mixer, follow these steps:
1. Mount the Mixer:Place the mixer into the designated rack slot and secure it with rack screws. Tighten the screws properly to prevent any movement.
2. Connect Audio Sources:Connect all audio inputs and outputs to the mixer. This includes microphones, instruments, audio interfaces, and any other devices you plan to use.
3.Connect Power:Ensure the mixer is connected to a reliable power source. Some rackmount mixers feature redundant power supplies for added security, while others may require external power conditioners to maintain stable operation.
4.Connect to Network (if applicable):Many modern rackmount digital mixers have network functionality, allowing for remote control or integration with other systems. Make sure to connect your mixer to the network if required.
Configuring Your Rackmount Digital Mixer for Optimal Performance
Initial Power-Up and Calibration
Once your rackmount digital mixer is physically installed, it’s time to power it up and start the configuration process. Here are a few steps to ensure proper initialization:
Power On:Turn on your mixer and check for any indicator lights or messages that suggest issues with the initial setup.
Firmware Update:Before diving into configuration, make sure your mixer is running the latest firmware version. Manufacturers often release updates to improve functionality and fix bugs.
Calibration:Perform any required calibration steps to ensure the mixer is set up for your specific environment. This could include setting up gain structures, optimizing input levels, and adjusting speaker or monitor outputs.
Configuring Input and Output Channels
A key aspect of using rackmount digital mixers is managing the input and output channels effectively. These steps will help you set up your channels for optimal sound:
- Assign Inputs:Connect all your audio sources (microphones, instruments, etc.) to the correct input channels on the mixer.
2. Set Channel Gain:Adjust the gain on each input channel to achieve a balanced signal level, avoiding distortion or clipping.
3. Routing Outputs: If you’re running a multi-zone audio setup, you may need to route specific audio signals to different output channels. Use the mixer’s software interface to route audio to the correct outputs, such as stage monitors, house speakers, or recording devices.
Setting Up EQ and Effects
Rackmount digital mixers often come with built-in equalizers (EQ) and effects processors, which allow you to shape the sound of your mix. Here are some general tips for using EQ and effects:
EQ Settings:Adjust the EQ for each input channel to enhance clarity and balance. Boost or cut frequencies to suit the acoustics of your space and the tonal characteristics of the audio source.
Effects Processing:Many digital mixers include built-in effects such as reverb, delay, compression, and modulation. Apply these effects as needed to create a polished, professional sound.
Tips for Efficient Operation of Rackmount Digital Mixers
Use Presets and Templates for Quick Setup
Many rackmount digital mixers come with preset templates or user-configurable profiles, which can save time during setup. These presets allow you to recall specific configurations for different audio scenarios, whether you’re working with live sound, studio recording, or broadcasting. By saving your favorite settings, you can quickly load them for future events or sessions, ensuring consistency and reducing setup time.
Monitor Your System Regularly
During operation, it’s crucial to keep an eye on the mixer’s performance and monitor signal levels. Use the built-in monitoring tools to check input and output levels, as well as system diagnostics. If you notice any abnormalities—such as distorted audio, clipping, or signal loss—take action to resolve the issue promptly. Regularly monitoring your rackmount digital mixer will help you catch problems early and maintain high-quality audio throughout the event or session.
Familiarize Yourself with Remote Control Options
Many modern rackmount digital mixers come with the ability to be controlled remotely, either via a tablet, smartphone, or desktop computer. Familiarizing yourself with the remote control software or apps can provide more flexibility during live events, allowing you to make adjustments to the mix from different locations. This can be particularly useful for sound engineers who need to adjust levels for specific performers or monitor the system from the audience’s perspective.
Troubleshooting Common Issues with Rackmount Digital Mixers
No Sound or Low Output
If you encounter a situation where there’s no sound or the output is too low, check the following:
– Ensure all input channels are properly connected and set to the correct levels.
– Verify that the master output is turned up and not muted.
– Check all cables for damage or loose connections, and replace them if necessary.
– If you’re using digital signal routing, ensure the signal path is correctly configured.
Audio Distortion or Clipping
If the audio is distorted or clipping, it may indicate that the input levels are too high. Adjust the gain on each input channel to prevent clipping. You may also need to apply some EQ or compression to balance the sound and prevent excessive peaks.
System Freezing or Lag
In some cases, rackmount digital mixers may experience system freezing or lag, especially if they’re handling a large number of inputs or outputs. To resolve this issue, try rebooting the system and ensure that your mixer’s firmware is up-to-date. If the problem persists, check for any faulty connections or hardware issues that may be affecting system performance.
Maintaining Your Rackmount Digital Mixer
Regular Cleaning and Inspection
To ensure the longevity of your rackmount digital mixer, it’s important to clean it regularly. Dust and debris can accumulate over time, causing potential issues with performance. Use a soft cloth to wipe down the surface and clean the cooling vents. Avoid using harsh chemicals, as they could damage the equipment.
Check Connections Periodically
Periodically inspect all audio and power connections to ensure they remain secure. Loose or damaged cables can cause signal interference or loss. Also, check the mixer’s internal components for any signs of wear or damage, especially if the mixer is used frequently.
Rackmount digital mixers are powerful tools that provide sound engineers with the flexibility, control, and reliability needed for professional audio production. By following the guidelines outlined in this article, you can ensure a smooth setup and efficient operation of your mixer, resulting in high-quality audio output for any live sound, recording, or broadcasting scenario. Proper configuration, regular maintenance, and staying familiar with troubleshooting techniques will help you get the most out of your rackmount digital mixer and ensure its longevity in your audio system.